Wringr Recorder - Key Features and Functionality
To effectively use the Wringr Recorder, it's important to understand its core interface and how each icon functions. Below, we will break down the process step by step, explaining each feature and guiding you through its usage. Let’s begin:
Step 1: Starting the Recorder
- Once the Wringr Recorder is installed and launched, you will see the main interface, which includes options to create a new recording.
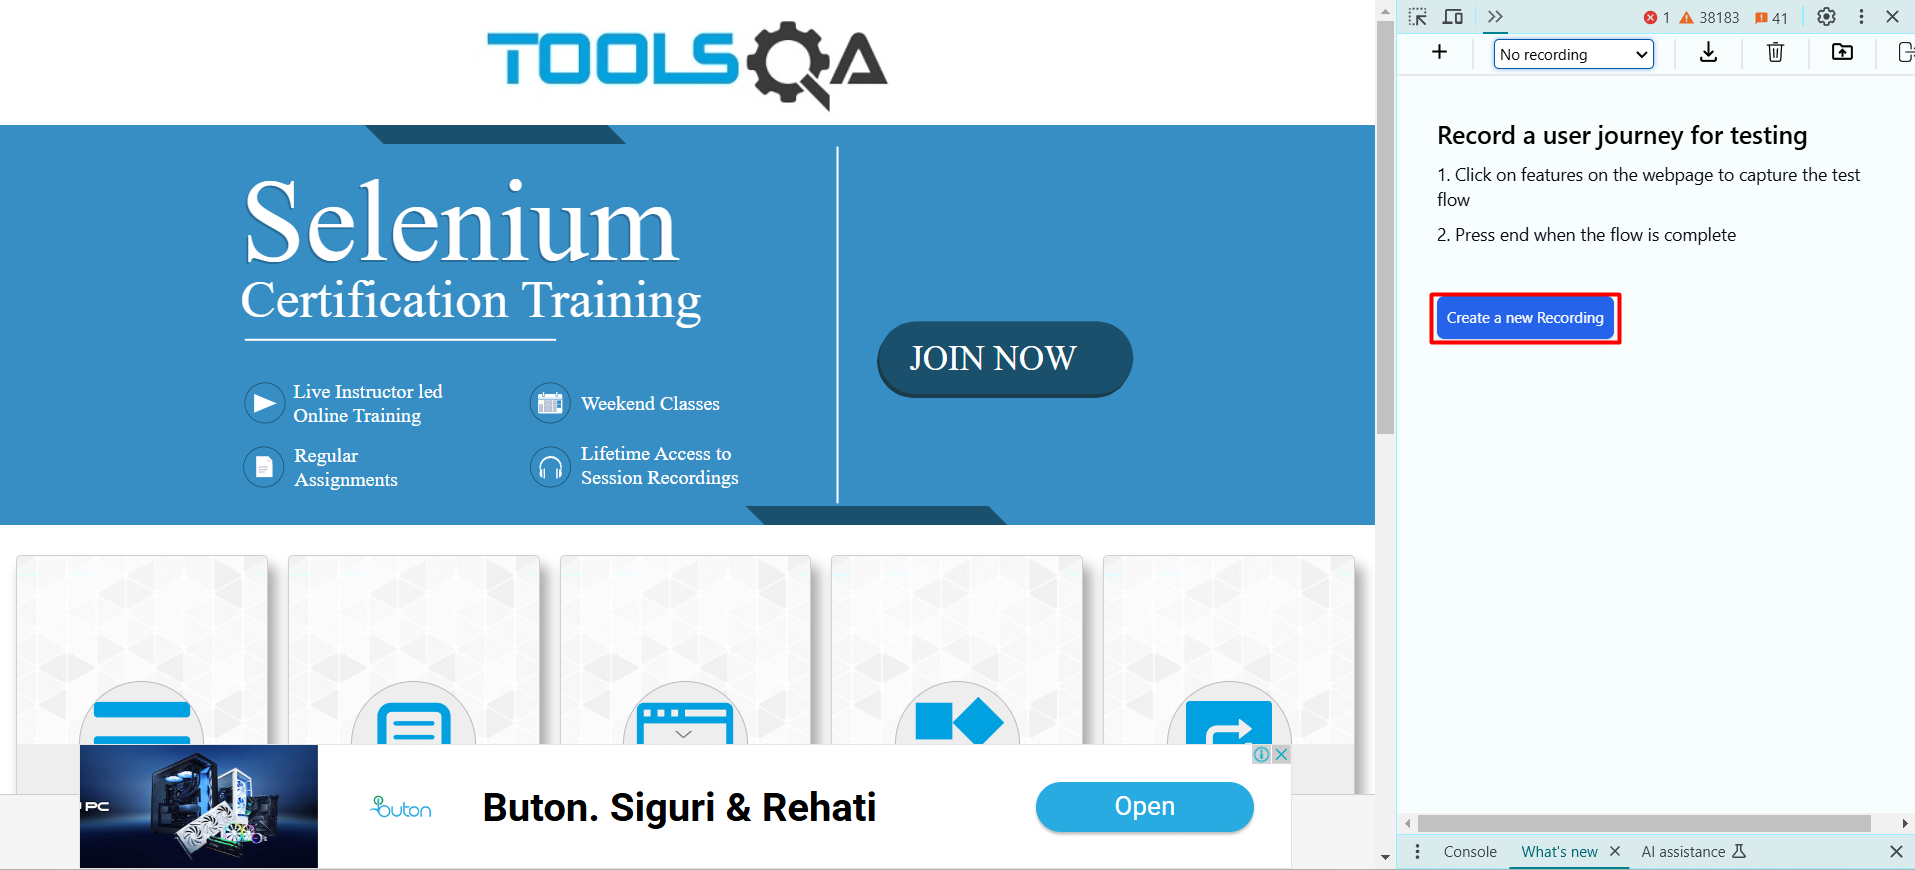
Step 2: Create a New Recording
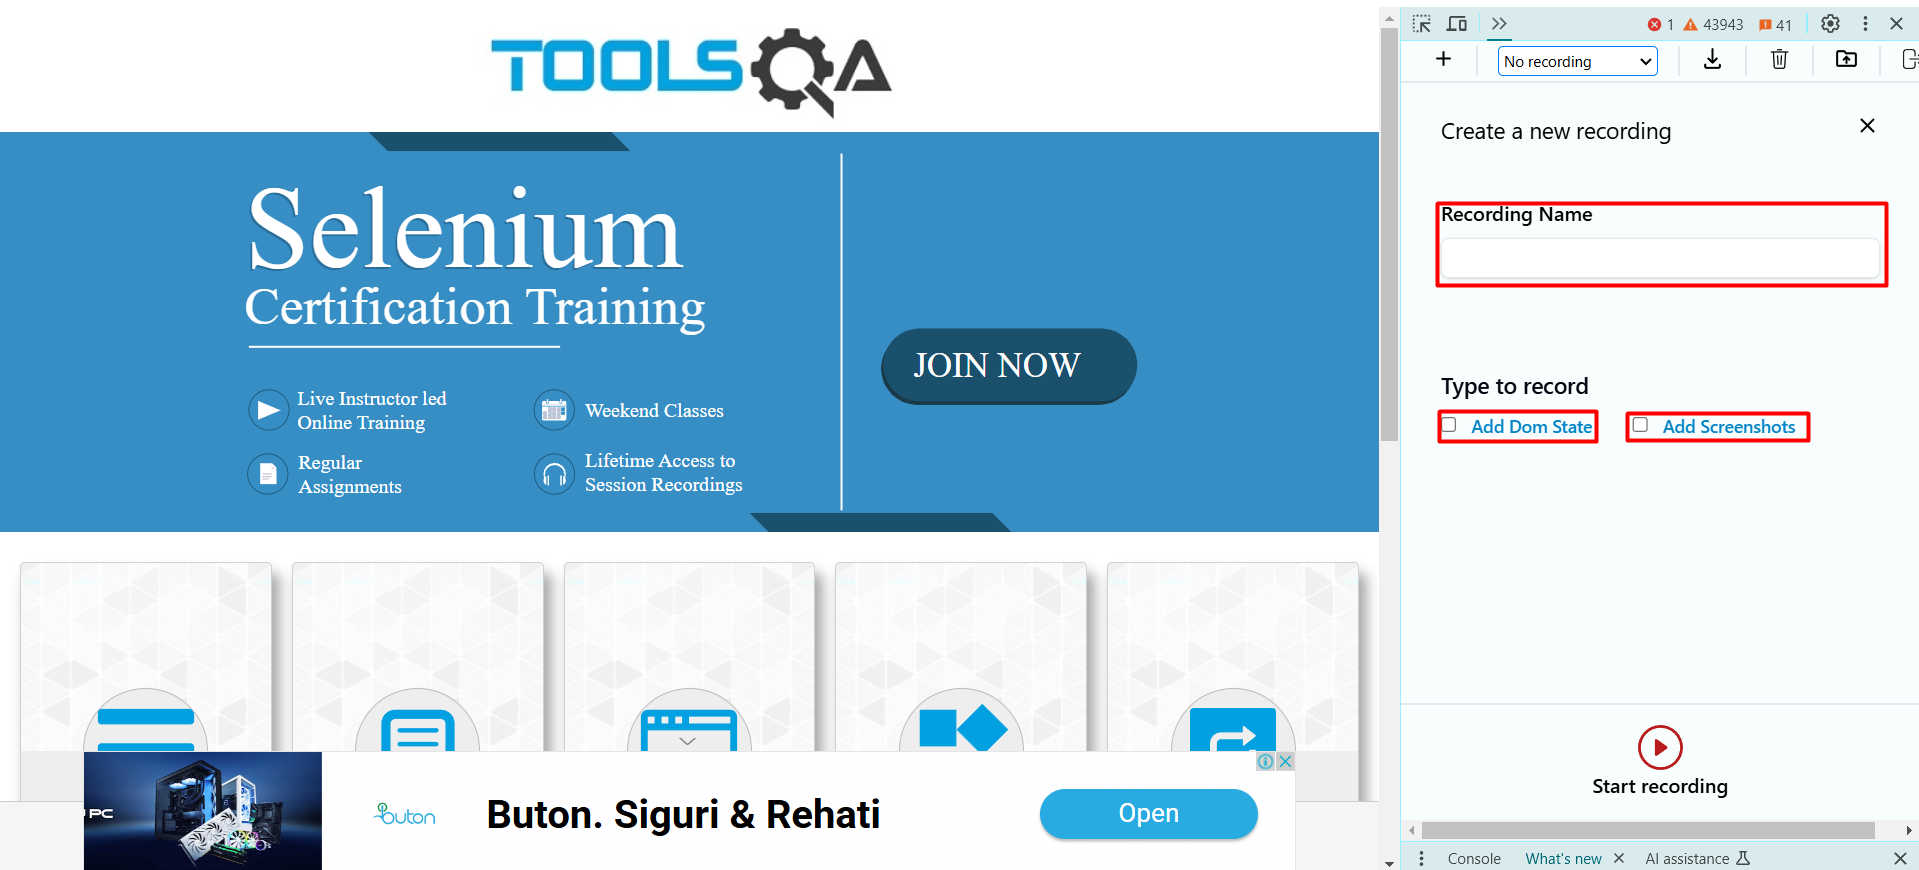
To create a new recording:
- Enter a Recording Name in the provided text field.
Select additional options:
- Add DOM State: Captures the state of the webpage’s Document Object Model (DOM) during the recording.
- Add Screenshots: Includes visual screenshots of the page to supplement your recording.
Step 3: Starting the Recording
- Red Circle Icon (Top-Left): This indicates that a recording session is currently in progress. When clicked, the recording begins tracking actions taken on the webpage.
Editing the Name of the Recording
-To rename your recording in Wringr Recorder, click the pencil icon next to the recording name, type the new name in the text box, and press Enter to save.
Explaining the Eye Icon Options in Wringr Recorder The eye icon in the Wringr Recorder interface provides visual tools for managing the visibility and highlighting of elements during the recording process.
- Show Borders (Highlight Unused Elements)Functionality: This option outlines or highlights elements on the webpage that were not interacted with during the recording session. Purpose: To identify parts of the page that were untouched during testing. Helps in ensuring thorough test coverage by showing what elements were ignored.
- Show Animation (For Better Visibility)Functionality: Adds a visual animation effect to elements being interacted with, making them more prominent during playback or live interaction. Purpose: Enhances visibility of actions, especially for complex workflows. Makes it easier for testers or viewers to follow what’s happening step by step.
- Hide Visual EffectsFunctionality: Disables all animations or borders on the webpage, providing a clean view without distractions. Purpose: Allows testers to focus purely on functionality rather than visual highlights. Useful when no additional visual indicators are needed.
Step 4: Key Actions Being Recorded
The right-hand panel displays the recording details:
setViewport: desktop: This action captures the viewport size or screen resolution (e.g., desktop layout). navigate: This logs the URL being navigated to during the session (https://demoqa.com/...). click: svg: This logs any click events, such as clicking on SVG (Scalable Vector Graphics) elements or icons on the webpage.
Each action includes detailed metadata (e.g., object details), which can be expanded by clicking on the small arrow next to each entry.
Step 4: Ending the Recording
End Recording Button: At the bottom, the red stop icon ends the recording session. Once clicked, the captured actions are saved for further analysis.
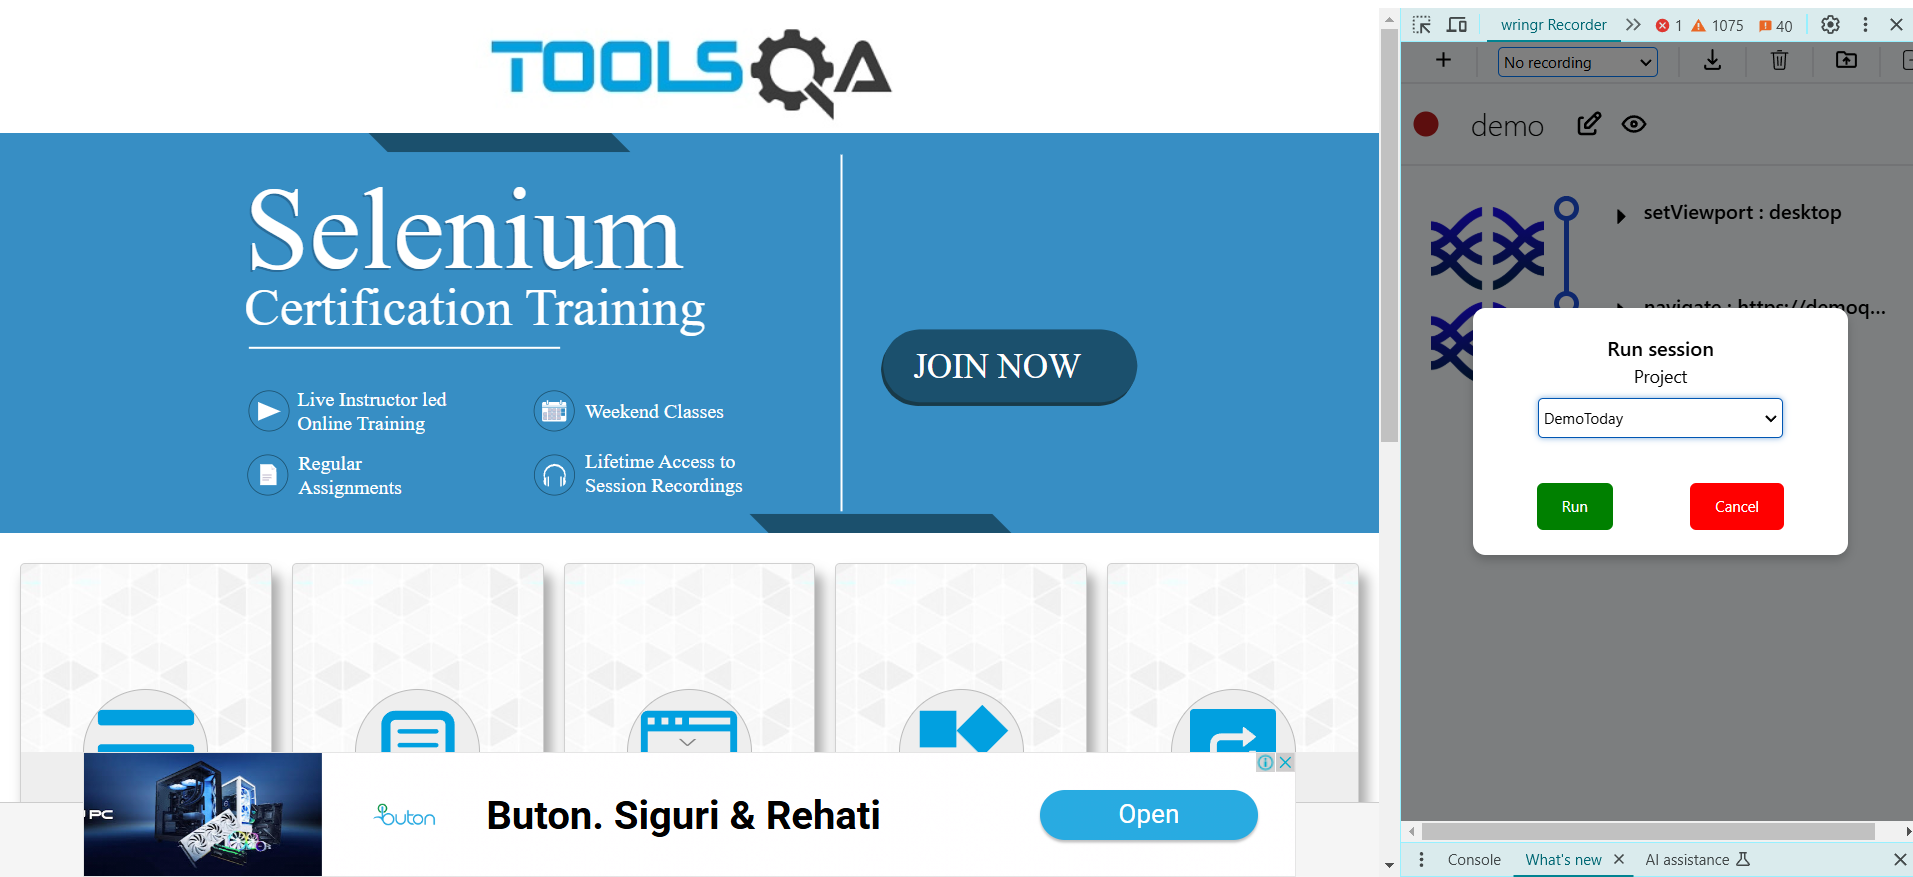
Step 5: Save/Send Sessions
Once you end the recording, you can either save the file locally or send it directly to our platform for further processing.
- Click on the Download icon to save the file locally to your device
- If you want to send files directly to the Wringr platform, click the Third button. You will be prompted to select the project you want to upload to. Once selected, click Run to send the recording.
- If you want to delete a recording, simply click the icon located in the top right corner